Pages

Saturday, July 16, 2011

Me, wanting to do Laundry?
Tips for making YOUR laundry room an enjoyable one.


Well, I don't know many people who enjoy doing laundry... laundry is one of those dreaded chores no one in the family wants to do. In fact, the laundry room is usually that one room with the door shut that no one bother's to enter. Don't you think the laundry room deserves some TLC too? Read below for some cheap and easy ways to spice up your old and deprived laundry room!

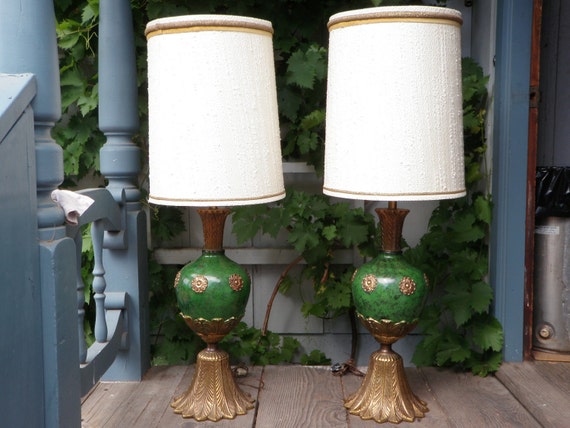
Add cute laundry-related art work. I always think this add some character to a laundry room. If you have a bath/laundry room, this is a great way to create some separation and distinguish the laundry area from the bath area. The above laundry prints are from Ballard designs- click here to see.
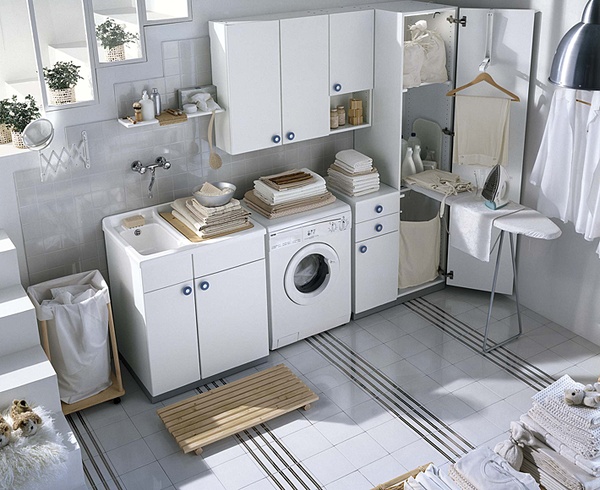
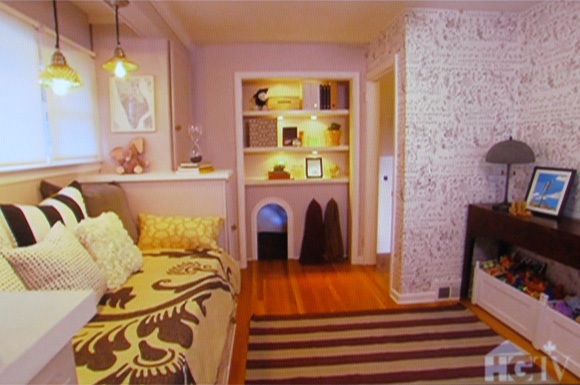
Another affordable way to add storage is to add shelves with decorative storage. You might want to base your room around the nautical theme as it is very calming. I suggest you try canvas textured fabrics colored in cremes,yellows, or blues (click here for rugby striped bin from the container store ).You might also want to look into having a counter on top of your washer/dryer. Unfortunately those of you without a front loaders will have to do without. However... if you are lucky enough to have one, adding an additional counter top above might be worthwhile. While this adds an ample amount of storage for your countless loads of laundry... this also adds for a more finished look. 
Turning a closet into a mini wash area is a great DIY for small spaces. Stack your washer and dryer to add more space and install built-ins or shelves for extra storage. Rather than installing doors to your new washroom, add curtains for a cheap alternative. 

Scroll down below to get inspired-


Tuesday, July 12, 2011

Vintage Lighting
Serena and Lily Seychelles Chandelier here.
Serena and Lily birds Nest Hanging Lamp here.
Anthropologie Ensnared lamp base here.
Etsy vintage 60's Italian style lamp here.
Etsy vintage woven table lamp here.


Tuesday, July 5, 2011

Sofas in Middle of Room
Recently, I redesigned my drab basement/playroom. We have an old couch that was pushed against our wall, it was far away from the television and our other couch/chair. EVERYTHING was against the walls, and as you may know, many well known designers claim that is a "no,no" in the interior design world. SO... I experimented. I'm happy to say that our sofa is now happily sitting away from any walls. I guess I am saying that the moral of the story is to be open to new ideas and don't be afraid to put YOUR sofa in the middle of  a room. Just remember to have a focus point!(fireplace, television, etc.). Below are a few sofas sitting freely in the middle of the room. 
As you can see, this room has a focus point(the fireplace) and two sofas. There is a desk lining the back of the first sofa- this is a little trick for you to take note- if your sofa's back is old and scratched up, just put a desk or table in front of it to cover it up... no one will ever know! 
I absolutely LOVE this room, it is so cute and colorful! The room doubles as a kitchen and living room, which is why the sofa is simply used as a divider to separate the two. Again, furniture doesn't always have to be surrendered to a wall- why do people always think that? Think of all the beautifully designed rooms you have seen in magazines and on television- I bet half the time the furniture isn't even against a wall! There's so much more options out there, just look around! 
Finally, we come to a room centered COMPLETELY around the fireplace. Before I go into an explanation as to how this works... I feel as though I should mention the beautiful rustic beams. I mean, come on, I know you were looking at them too! Enough said, this room is definitely well designed. As you saw in the first picture, a table was used behind the sofa. On either side of the it, tables were placed. If you look closely, the tables DO NOT match- that is perfectly okay. It was not a design mistake and they ordered the wrong table, it is fine if you find two side tables you like- just use both, if it works! I think I've said enough- don't be afraid to try different things, after all, it is your house and you can move it back! 


Monday, June 27, 2011

Storage in Style
Okay, everyone has done this at least once in their life- or maybe they still do? Let's face it, I know you have some clutter under that bed of yours! Remember those childhood days when Mom used to make you clean your room-but what do you do?-you shove the whole shebang under your bed. So why don't I help you with that? The images below are just a few creative design solutions for storage. 
Happy cleaning!
Below images from Bhg.com
Install shelves to store your book collection or kid's toys.
Buy boxed frames from just about any home decor shop and line the 
back with wrapping paper, scrap booking paper,etc.
Add shelving above a desk to make use of the space you have.

Adding shelves that line your walls is a great way to use the space you have while
 adding ALOT of storage.

____________________________

Okay, so you may be thinking, well I don't have all day, or, where am I going to find the space let alone the money? Well, it's actually PRETTY easy... shelves cost little to nothing when you know where to buy them. Places like ikea.com and target.com have great shelves for affordable prices. However, you could also go a different route- make the shelves yourself! Buy scraps of wood at a warehouse like Homedepot.com and get some vintage brackets(Anthropologie.com always has cute ones) for a cheap alternative. 
See below for images.

____________________________
Brackets
$22-$24


Design DIY
Before & Afters


Before:
After:


Before:

After:


Before:
After:


Before:
After:


Before:
After:

Refurbishing old furniture is like uncovering treasure. I mean seriously... did you see the pictures? Just sand the furniture down, paint it, add some personal touch, and you have a work of art! If you would like to see more DIY projects, check out my new posts coming soon!!! 


Above images courtesy of Better Homes and Gardens


Inspiration
Bedroom

Get that design brain of yours flowing and look at these amazing bedrooms! Sometimes a new idea comes from observing other's design aesthetic. Just take a look!


Above images from Better Homes and Gardens


Sunday, June 26, 2011

Headboard DIY
For this headboard solution, a shelf and a hanging cushion was used.
This creates an illusion of a headboard and adds some personal design style.
Shutters are a great headboard DIY project. I like these because you are able to customize and manipulate them to your liking. All you have to do is get some vintage shutters, sand 'em down, paint them, and voila! A perfect headboard - don't forget to make the bed!
Another great headboard solution is a door. You can literally find one anywhere! Paint it anyway you want- in this picture they chose to use two main colors, however you could choose to only use one. After you have refurbished your headboard door, put it on its side and hang it on your wall! It's as easy as 1,2,3.
We all have empty frames lying around, so why not make a headboard out of them?
Use wallpaper to put underneath the frame as a border and to add a decorative touch. Put pictures of your family or of sentimental value in the frames to personalize. This truly is one of the easiest headboard DIYs possible and one of the most creative.

DIY headboards are a way of personalizing your beds while adding design. Look around at thrift shops and restoration stores to find a headboard solution.
 You know what they say, "one man's trash is another man's treasure".


 3 Useful Items to Have
(www.momastore.org)

#1:Prato umbrella stand

Never know where to store you're loose umbrellas?
This plastic umbrella stand can hold up to twenty umbrellas for easy storage.
You'll never loose that trusty umbrella on those stormy days anymore.
$35, Momastore.org

#2:Multi-tool

This multi-tool features a hammer, adjustable wrench, pliers, wire cutter, file, blades,
 and a screwdriver with a twelve-piece bit set concealed in the handle. 
Say goodbye to wondering what to get Dad for his birthday!
$25, Momastore.org

#3:Ray tray
Every household should own a ray tray- this modern three tiered basket is perfect 
for storing fruits and vegetables. Don't throw your beautiful fruit and 
veggies in the back of the fridge- display them as a piece of art in your kitchen.
$125, Momastore.org 


Reading Nooks

This adorable playroom is yet another wonderful creation by Genevieve Gorder (HGTV telivision host for interior design). This room is definitely worth sharing,seeing that the design detail is amazing. If you look on the back wall,  you can see a little nook Genevieve created for the children. I thought this was such a cute idea that I wanted to share with you all MORE cute nooks. I think I've found my new obsession!!!

More Reading nooks for children:
This reading nook is by Pretty Handy Girl and was made in a closet. 
 DIY instructions on how to make a nook just like this one-
http://www.prettyhandygirl.com/2010/06/when-is-closet-not-closet-when-it-is.html
Okay, this nook is adorable! This nook is by Thrifty Decor Chick, another great 
nook creator. I discovered Thrifydecorchick.com through the Nate Berkus show. She also created 
a closet into a reading nook.

If you have an empty closet, put it to use and create a reading nook. *Remember, your kids aren't the only ones that will use it!

Style with Sophistication:
Add a pop of color in a neutral room with colorful flowers or vases.
Add texture and pattern to a room to make a statement.
Don't be afraid to mix different patterns together! Just experiment with it, 
change up the pillows in your house-it's a great way to shop in your own house!!!
I absolutely ADORE this beautifully designed bathroom. So simple, 
yet so beautiful! Don't give yourself a design headache- just go with your style instinct!


Followers